Citrus Tree Guide: Best Time to Plant Citrus Trees
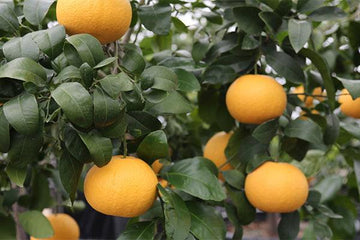
There’s nothing quite as sweet as walking out into your backyard and picking a citrus fruit off of a tree. From grapefruits to lemons, limes, and oranges, many gardeners grow a variety of citrus fruits successfully and many prefer planting in the fall to give their trees plenty of time over the winter to develop a strong root system. Trees also require less water in the colder months and less watering is always a plus.

Before you begin digging holes for your citrus trees consider your planting zone. Any USDA Hardiness Zone north of zone 8 should plant citrus trees in containers, as most citrus will suffer damage when exposed to temperatures under 32 degrees F. Gardeners in zone 8 can plant citrus outside as long as it’s on the south or southeast side of the house for protection. Zone 9 and above can safely grow citrus in their gardens without much need for added protection — although it’s always best to be prepared to cover them up in case of a fluke cold snap. And as always, if you have any questions, reach out to your local county extension office for the best times and methods in your area.

Steps to Planting Citrus in Autumn
1. Choose a sunny location. Citrus trees demand sun, sun, sun — so don’t even think about that dappled partial sun area of your garden. Plant your tree in an area where it will receive full sun all day long.
2. Purchase a tree with a well-developed root system. Or as I read in another article, “not a stick in a Dixie cup.” Buy a good-sized tree with mature roots because it will become established quicker and begin producing fruit sooner.
3. Make sure your soil is well-drained. Citrus needs a decent amount of moisture but doesn’t enjoy being water-logged, so be sure your soil retains water but doesn’t hold it in and create a soggy mess.
4. Dig your hole. You’ll want to dig a hole that is big enough to accommodate your tree’s root system, so the size of your hole will depend upon the size of your tree. However, a 2-foot wide hole is usually large enough. Dig to a depth that is equal to the container depth of the tree.

5. Remove outer soil from around the rootball. If you’re planting a container-grown tree, carefully remove it from its nursery pot and loosen some of the outer soil around the rootball.
6. Plant and mulch the tree. Put the tree into the hole, centering it and making sure it’s upright and not tilted. Backfill the hole with soil over the roots, tamping to remove air pockets. You can mulch around the tree, but be very careful to avoid mulch contact with the tree trunk, which can cause fungal problems. A good rule of thumb is to keep the mulch about 12 inches away from the base of the trunk.

7. Install tree guards. Tree guards on the tree’s trunk protect it from damage caused by rabbits and rodents, as well as sunscald, cracking, and splitting. If your young tree is already bearing some fruit you may also want to cover it with some netting to protect the fruit from animals.
8. Water it correctly. Water your tree 2 to 3 times the first week, 2 times per week for the next few weeks, and then weekly thereafter. Aim for a deep soaking rather than a light sprinkling, but be prepared to give your tree a little more water if your area is having a hot spell or no rainfall.